Part1. Large opening presser foot "applique embroidery."
The front end of the opening has a larger opening, which allows for better observe the needle drop area. It is suitable for making appliqués, sewing at turning points, stitching lines, etc.
To sew decorative stitches on a seam or a pattern:
Align the center mark of the presser foot with the position of the seam or pattern to be sewn, and then start sewing.
Appliqué:
1. The center mark of the presser foot is aligned with the edge of the appliqué;
2. Choose appliqué stitches/dense zigzag stitches for appliqué stitching.
Part2. The presser foot of the seam guide rod is the "pressing line."
1. Help you sew horizontal lines with equal spacing. By sliding the position of the seam thread guide left and right, you can adjust the horizontal line
distance. Sew the first straight line;
2. Insert the silk thread guide rod into the hole on the presser foot holder, or into the hole at the back of the synchronous presser foot;
3. Move left and right to adjust the position of the sewing thread rod to make it align with the first straight line sewn;
4. Adjust the silk stitch wire rod to the ideal horizontal line spacing width;
5. Start sewing, and make sure that the seam thread bar coincides with the first straight line when sewing.
Part3. Hemming and seaming presser foot "Hemming."
Sewing hemming stitches to prevent the fabric from fraying.
1. Select the overlock stitch;
2 Install the hemming presser foot;
3. Lower the presser foot so that the presser foot guide is close to the cloth edge that needs to be wrapped;
4. Sewing along the guide.
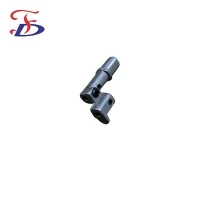
Part4. Single-sided zipper foot "zipper."
Installing zippers and piping is even easier. The position of the presser foot can be adjusted when making zip/piping and other uneven items.
It can easily cling to the edge of the zipper/piping to achieve perfect results.
1. Install the presser foot and select the straight stitch;
2. Determine the position of the presser foot so that it is directly above the longer feed dog on the left or right side;
3. Loosen the screw on the back of the unilateral presser foot, move and adjust the presser foot left and right to ensure that the machine is aligned with the presser foot opening;
4. Rotate the handwheel to ensure that the needle does not touch the presser foot when the needle falls, and then tighten the screw on the back side;
5. Start sewing.
Part5. Seam presser foot "stitching."
It can stitch fabrics, sew welt stitches, and install lace.
Fine pleats:
1. Fold a piece of fabric in half, opposite sides facing each other, and then iron it;
2. Place the crease close to the left side of the seam presser foot guide groove;
3. Open the fabric after sewing.
Seam two pieces of fabric:
1. Please align the edges of the cloth or lace, etc., on both sides of the guide, with the front facing up;
2. The guiding device is close to the seam, and the stitching starts.
Sewing uniform seam:
1. Align the edge of the fabric with the guide groove of the seam presser foot;
2. Adjust the needle position so that the needle drop point is at the ideal position from the edge of the cloth, and then lower the presser foot and lift the lever to lower the needle;
3. Start sewing.
Part6. "Five Holes" for Rope Presser Foot
It is used to sew 1-5 strings or decorative threads.
Choose the zigzag stitch width of the Brother Home Sewing Machine as 7mm.
1. Thread the 1-5 string or decorative thread to be sewn through the respective guide holes on the presser foot;
2 Install the presser foot and pull the string or decorative thread from the bottom of the guide groove to the back;
3. Arrange the string or decorative thread neatly, select the zigzag stitch, and adjust the stitch width to a maximum of 7mm, and then start sewing.
Part7, "Three ropes" inlaid rope presser foot
Used to sew 1-3 strings or decorative threads. Especially suitable for making decorative rope effects!
1. Slide the 1-3 string belts to be installed from the right side of the guide groove of the respective presser foot into the guide groove of the respective string belt (if a single rope is used, please use the guide groove in the middle);
2. Install the presser foot, pull the string from the bottom of the presser foot to the back of the presser foot, then select the zigzag stitch, adjust the stitch width to the maximum, and then start sewing.
Part8, thin material pleated presser foot "lace."
Used for the pleating of fabrics, it is an ideal tool for making clothing and home accessories. Especially suitable for sewing thin to medium-thickness fabrics.
1. Select straight stitch and adjust the needle position to the left needle position;
2. Increase the tension of the upper thread (the greater the tension of the upper thread, the more obvious the shirring effect);
3. Place the fabric to be pleated under the presser foot, with the surface facing upward;
4. Put the fabric that does not need shirring in the guide groove in the middle of the presser foot, with the surface facing down, and align the right guide groove of the shirring foot
(Seam allowance is 1cm);
5. When sewing, please pay attention that the upper and lower fabrics are separated and not clamped in the same layer, and do not pull the fabrics forcefully during the sewing process; the shirring effect may not be achieved.
*If you only need to shirr a single layer of fabric, just place a layer of fabric to be pleated under the presser foot and start sewing.
Part9. Braid presser foot: "Edge, ribbon, sequins, cord buckle."
It can be used to install trims, ribbons, sequins, cord buckles, etc,. with a maximum width of 5mm.
◆Before installing the presser foot, please loosen the screw on the presser foot, and then insert the braid along the guide groove on the presser foot;
◆Slide the guide groove on the presser foot back and forth to adjust to a position suitable for the width of the braid;
Tighten the screw and pull the braid to the back of the guide groove;
◆Install the braid presser foot on the sewing machine;
Select the zigzag stitch and adjust the width of the stitch to a size slightly wider than the width of the knitted fabric;
◆Start sewing and fix the knitted fabric in the desired position of the fabric.
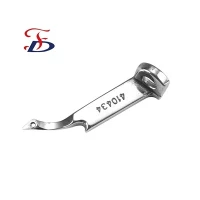
Part10. Blind stitch presser foot "Hemming, blind stitch."
With the adjustable guide on the blind stitch presser foot, blind stitches can be made on a variety of fabrics.
The blind stitch presser foot can be used to make hemming stitches, install lace, and sew fabric seams, making it both decorative and practical.
Making a blind stitch
- Fold the fabric along the desired edge of the crease, and then baste about 5 mm away from the edge of the fabric; fold back the fabric along the basting stitches, and then place the fabric back up;
- Place the fabric so that the edge of the crease is close to the guide of the presser foot, and then lower the presser foot lever;
- Choose the blind stitch; adjust the stitch width until the needle drop point slightly grasps the crease;
- Start sewing;
- Remove the sparse stitches after sewing. Making overlock stitch/welt stitch
- Choose overwedge stitch or/straight stitch stitch;
- Adjust the needle position to make it fall at a suitable position from the edge of the fabric, and then drop the needle;
- Adjust the presser foot guide to make it close to the edge of the cloth, and then lower the presser foot lever.
4. Start sewing.
Part11. Jacquard presser foot
"Decorative, tassel effect" is used to make decorative 3D wire loops and tassel effects. Select the curve stitch and adjust the stitch width to more than 5mm.
Adjust the tension of the upper thread and try sewing on the fabric to be sewn until it is adjusted to a satisfactory effect; align the guide groove at the center of the presser foot with the pattern line on the fabric, and start sewing. (If you cut it from the center of the loop, you can get the tassel effect)